About
Blog
Stemslider
Workshops
Bouquet Recipes
Shop
New mini-StemSlider: 15% off with Bundless & FREE Vase & Engraving✨
Browse around
topics
Hello Everyone!
floral designer + educator
I'm Koko
I'm floral designer, gardener and your flower bouquet coach. I'm so glad you're here. Let's enrich your bouquet skills together! Read my story
4 Mistakes I Made When Creating Loose and Airy Cascading Bouquets

Posted In
February 1, 2024
Posted On
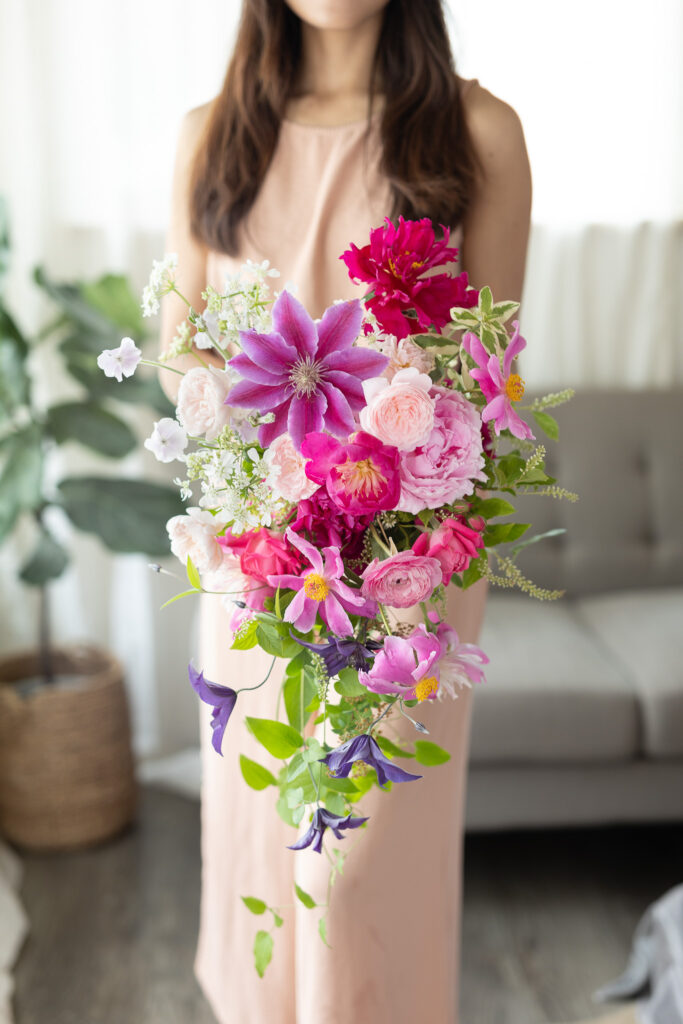
I adore the shape of loose and airy cascading bouquets, focusing on creating a waterfall-like form with looseness and lightness. Various methods can be used to create cascading bouquets, such as 1. starting with making a round bouquet and adding the cascading part later, or 2. outlining the entire structure first and then fill the entire space gradually, or 3. beginning with creating the cascading part first and building up to the middle and top sections last.
Long time ago, when I used a bouquet holder with a small floral foam and a plastic handle in the flower schools, I outlined entire frame first and filled the space. However, I now use a simple spiral method without foam or cages, and I prefer to start with the cascading parts (bottom) first and building up to the top sections.
I’ve previously addressed the challenges and tips of creating cascading bouquets in another post, 7 Tips for creating a loose and airy hand-tied bouquet. I think that one of the challenges when it comes to creating cascading bouquets is the limited experience, unless one runs a floral business dedicated to making wedding bouquets and receives numerous inquiries throughout the year.
How often do you have opportunities to create cascading bouquets? I typically had only a few chances per year, which made it take longer for me to improve my skills in this area, but I received inquiries every year.
If you aren’t entirely satisfied with your skills in creating cascading bouquets and are seeking a solution to achieve a loose and airy appearance, I hope this post can help you!

1. Not using enough fillers or supports:
Ensure you have enough fillers, branches, or twig nests to support the position of flowers in the middle area. The key is to prevent the flowers from shifting down towards the bottom, especially heavy large blooms in the center. Nice hardy fillers like Sedum, Spray roses, Celosias, (many more!), or supports like twig nests (small nest with Curry Willows), branches with side shoots (like Mimosa), or chicken wire, or cage in the middle are very helpful to keep the flowers in position, without the need to add more and more flowers to finish up.
2. Placing main focus flowers right in the center:
Instead of adding large, eye-catching blooms right in the center, position them slightly above the center. This creates a lighter appearance as the eyes are drawn to the upper area, making the cascading tail look longer and lighter.
3. Overloaing the flowers in the tail:
To achieve a loose and airy look, keep the bottom part (tail) light with some movement. I added large blooms like Garden rose in the tail as I had many beautiful garden roses and wanted to show off. But in the result, the bouquet became heavier and larger than I intended. If using large Phalaenopsis orchids for the cascading tail, adding Jasmine vines or other greens/flowers that has lightness and movement behind the orchids will make it look lighter and looser.
4. Making the width of the bouquet wider:
Overloading flowers on the both sides cause the bouquets to become wider and larger. Rather than adding more flowers on the sides to try to create a perfect oval shape, create a narrower shape with fewer flowers using the in-and-out method, and focus on building the bouquet upward.

As a side note, I’ve created a free video training on ‘How to Make a Loose and Airy Cascading Bouquet’. If you are interested in learning about this more, check out the video from here!
Related
Pin
Share
Leave a Reply Cancel reply
Previous Story
next Story
© 2025 Koko Floral Design, LLC
Join Me on Insta
How to Effortlessly Make a Loose & Airy Cascading Bouquet
I'm so glad you're here. Let's elevate your bouquet-making skill together!